Facebook Twitter InstaGram YouTube
  • STORE
  • ABOUT
  • WEAR GEAR
    • Pouches
    • Gloves
    • Footwear
    • Belts
    • Protective
    • Clothing
    • Packs/Bags
    • Vests / Platforms
    • Misc
  • EQUIPMENT
    • Admin-Intel
    • Electronics
    • Tools
    • Illumination
    • Medical
    • Hydration
    • Comm Gear
    • Dive-Swim
  • CUSTOMIZE
    • Info
    • Materials
    • Webbing
    • Elastics/Cord
    • Hardware
    • Prototypes
    • DIY-Stores
  • ARTICLES
  • WEAPONS
    • Rifles
    • Pistols
    • Optics
    • Holsters
    • Slings
    • Stocks
    • Accessories
    • Blades
  • MORALE
    • Morale Patches
    • Amusement
  • LINKS
  • CONTACT
  • SEARCH

Protective

TACTICAL TAILOR MICH Helmet Cover

Details
Category: Protective
Created: Wednesday, 25 July 2007 02:48

It Isn't protective, but thought this was the best category placement for now:

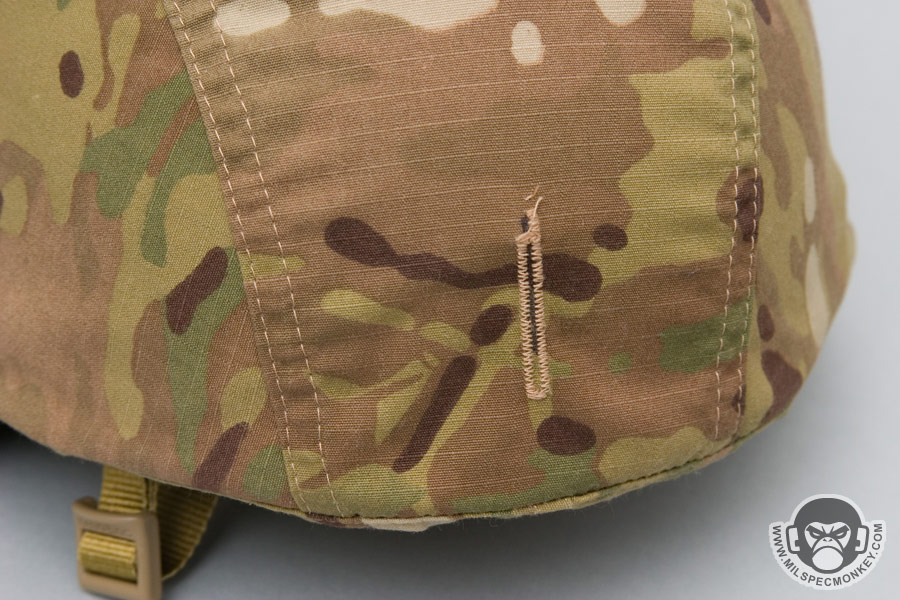
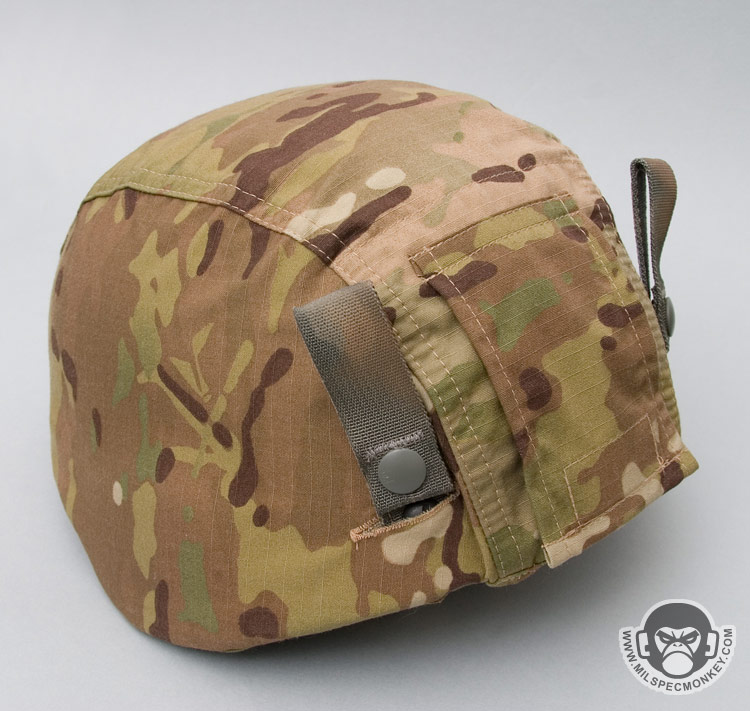
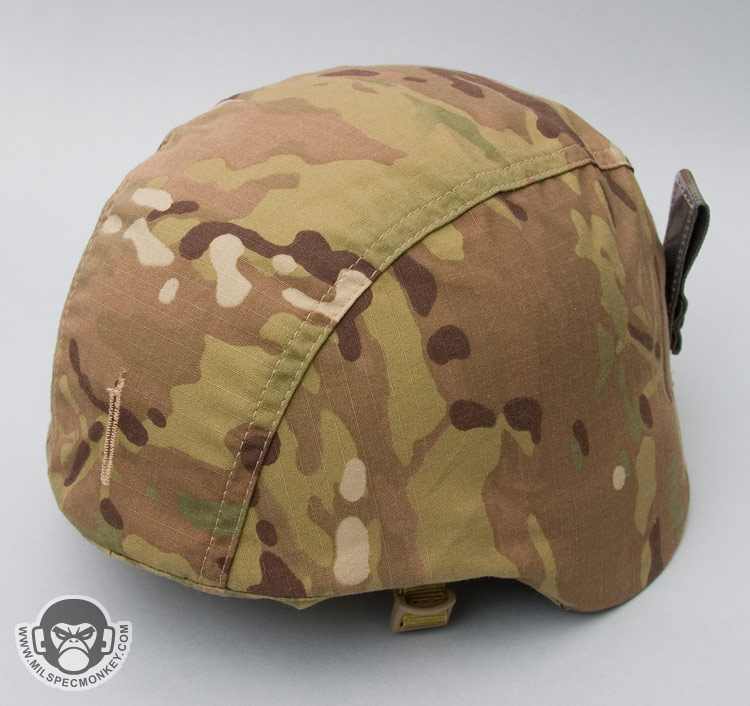
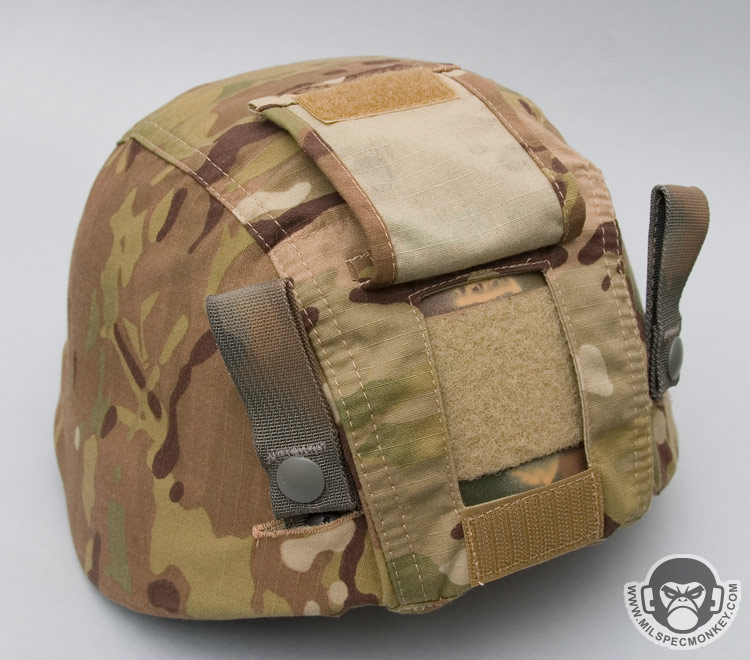
A solid and affordable cover here. Made of 50/50 NYCO makes the material a good compromise of lightweight and durable. The front has a button stitch for an NVG screw hole. The cover comes with this area intact, so just cut er' open when you need to screw on your NVG mount. Reinforced holes are in the back for goggle loops and of course holes for the chinstrap system. The exterior holes, typically for foliage placement, are not present likely to cut down on the cost and they are rarely used.

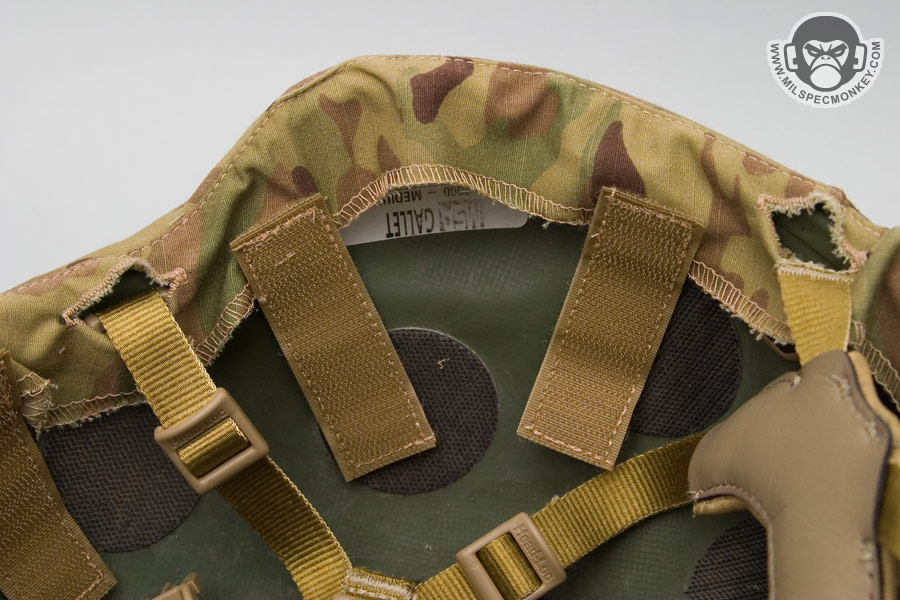
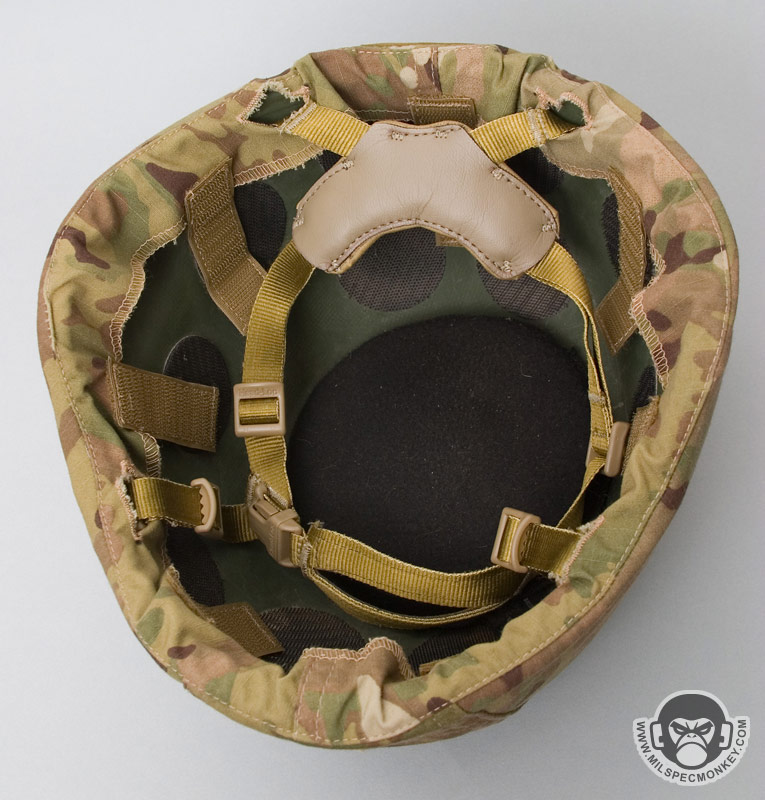
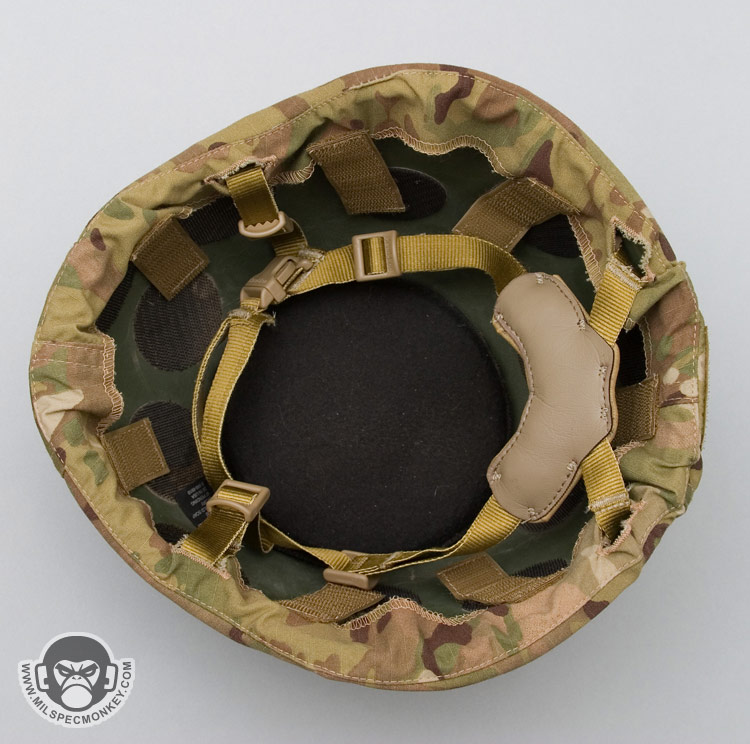
The back has a velcro flap for placing in a strobe, but help with wire management as well. When putting the cover on, you will need to unscrew the strap harness off to get everything to go on nice and proper. If you don't care so much about proper, you can just ram it on, but the fabric will bunch up a little where one is supposed to route the harness through the holes. To spare others on installation embarrassment. I will share the steps that took me too long to find out. The cover isn't designed poorly, I just hadn't done it before on a MICH. Anyway, first you want to take out your pads except the big center one then unscrew all 4 harness points. Put on the front half of the cover and then route the frontal 2 points of the harness through the aligned holes in the cover. Since the cover isn't fully on you can still move the cover around to re-screw the front 2 points. Next fully put the cover over the helmet. Route the back 2 harness points through the aligned cover holes. Now you might be asking...How do I get to the screws? You can sneak the screws on to connect to the harness through the goggle loop holes. Now would be the time to add those if you wanted them as you screw everything down. To finish up, use the velcro straps to connect to the velcro already inside the helmet. Your pads will happily go on the standard helmet and cover velcro mix. As for nit-picky stuff, the back goggle loops holes were spaced a little further apart than my helmet screws were, but was manageable. Available in MICH sizes Small-Medium and Large - XLarge in ACU(UCP) and Multicam.

  • tacticaltailor
  • Prev
  • Next

Random Articles

IMAGE Maglula UpLULA pistol loader
Saturday, 07 July 2007
I picked one of these up at shotshow and I'm hooked on it. Call me a wuss, but if you ask me when you go to the range you are there to shoot and not... Read More...
IMAGE Maxpedition Excelsa Framelock Folding Knives
Tuesday, 15 April 2014
Maxpedition has been going for more of a classy look meets hard user design lately and the Excelsa knives are a good example of that. Made of great... Read More...
IMAGE Lone Star Medics - Medicine X
Friday, 15 October 2010
I've taken a grab bag of Tac classes and pretty much all of them were primarily about putting holes in bad guys, so I got to thinking diversifying a... Read More...
Tactical Response - THE FIGHT - Force on Force Scenarios
Sunday, 09 August 2009
Back in February the Tactical Response wagon came nearby my neck of the woods and with a little help from Original Special Operations Equipment owner... Read More...
IMAGE FIRST LIGHT USA Tomahawk MC with TRS platform
Tuesday, 11 November 2008
SPECS: WEIGHT- 5.6 ounces DIMENSIONS- 3.35” H x 2.38” L x 1.48” W MAXIMUM LIGHT OUTPUT- 120 lumens CONTROL FUNCTIONS- Momentary, Constant-On (3... Read More...
IMAGE COUNTY COMM Kershaw T-Tool
Saturday, 05 July 2008
Since I don't have a big Torx screw set this guys comes in handy to adjust the clips on my knives. Very compact and lightweight, it comes with the... Read More...
IMAGE EMDOM SAF Admin Pannel MC:
Saturday, 08 July 2006
DIM: 4.5" H x 5.5"One of the more slim admin pannels on the market. The main pocket is elastic on the sides, however not big enough to hold a pen.... Read More...
IMAGE TACTICAL TAILOR - Crossfire Concealed Carry Bag
Thursday, 30 July 2009
DIMS: Weapon compartment: 8" tall X 7.5" wide X .5" deep (averaged since tapered) Main compartment: 7.5" tall X 7.5" wide X 3" deep Secondary... Read More...

MSM STORE

If you find this site useful, please check out our store to say thanks! We have a good selection of morale and tactical accessories.

image

©COPYRIGHT MIL-SPEC MONKEY 2023 MADE IN USA